Your Roadmap to a Gorgeous At-Home Blowout That Lasts
It seems at times that the fastest route to gorgeous hair is a professional salon blowout. That said, if you are between salon services or don’t have the time (or cash) to invest in blowout, you can still (nearly) achieve a salon quality blowout at home. How? Here is your roadmap…
It Starts in the Shower
A great blowout starts with using the right shampoo and conditioner for your hair type. If your hair is flat or lacks volume, go for a volumizing formula. If your hair is dry or textured look for gentle sulfate-free shampoos.
Rinse Well
You may use the best shampoo ever made for your hair, but it is all for naught if you don’t rinse it out completely. Shampoo residue leaves hair dull and lifeless. And remember this–use warm, not hot water to prevent dryness.
Condition, Condition, Condition
Practically everyone should use conditioner. For those you avoid conditioner because you worry that it will flatten your hair, just change how you use it. Apply it sparingly from only mid-shaft to ends or just even your ends only if your hair is very thin or fine. Again, never rinse hair with hot water. Warm water will do the job. To prevent frizz, also do a final cool-water rinse after conditioner is rinsed out. This will close the hair cuticle to smooth strands.
Be Careful with that Towel
Never rub your hair to remove excess water post shower. The towel fibers are too rough and lift the hair cuticle to create frizz. Instead, use a microfiber towel or even paper towels to remove excess water.
Pick the Right Styling Products
If you are going for the smoothest look possible, use a heavier cream-based grooming product or gel. If you just need some light hold and volume go for a volumizing mousse or spray. Follow with a heat-protectant to save your strands and combat frizz.
Work on Damp, Not Sopping Wet Hair
Although an obvious point, working on sopping wet hair takes too much time and effort. Instead, rough dry your hair on low heat (as they always do in the salon) until about 70-75% dry.
Use the Right Blow Dryer
The best voluminous blowouts start with a good quality blow dryer (at least 1875 watts). Also make sure to invest in a frizz-fighting Ionic dryer if you have issues with frizz.
Grab the Right Brush
The best brush to use for a blowout is a round boar bristle brush or (for even more tension and control) a boar bristle brush mixed with nylon bristles. Both work well without damaging your strands. Also make sure you have a bunch of hair clips on hand to section the hair. Which leads us to the next tip…
Work in Sections
Always work in small sections (as pros do in the salon) for the smoothest results. There are many ways to section hair, but the easiest way to do this is to create one section on the top of your head from forehead to crown (about as wide as the width of your brush) and create 2-3 horizontal sections on the sides and back of your head (depending on the texture and thickness of your hair).
Start in Back, Finish on Top
Now that you have sectioning down, we recommend you start your blowout at the nape of your neck (after sectioning and clipping the upper portion of your hair). Once the back is dry, section and dry each side before completing the (most important) top section.
Keep to Brush Width
Within each section you are working on, gather hair no wider than the width of the brush for the best control.
Point the Nozzle Down
For maximum shine and smoothness, point the nozzle down on the hair. This will smooth the hair cuticle to add shine and prevent frizz.
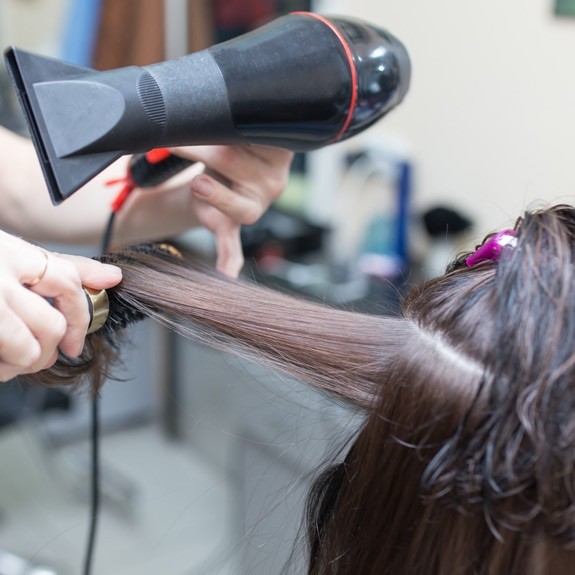
Use Tension
Proper tension is also important. Place the brush underneath the hair and move the brush and the dryer down the length of the section (with the hair dryer pointing down on the hair shaft), making sure to keep the hair taut. Repeat this step again, this time placing the brush on top of the section. Repeat until section is dry, alternating between placing the brush both on top of and underneath the section of hair. Unpin your next section and repeat these steps.
Add Volume at the Crown
When you dry the top section, you can build killer volume by just changing the direction of the tension. Instead of pulling the hair downward with your brush (as you did on the sides and back), pull the hair upwards and back to the crown as you move the dryer with it.
Use the Cool Shot
Once the hair is completely dry, pass through your entire head using the cool shot button on your hair dryer. This will close the hair cuticle to prevent frizz.
Add Some Waves
Since tousled waves are so hot right now, you may want to add a few bends once your blowout is complete. Using a mid-sized barrel curling iron, wind a 2-inch section of hair around the iron starting at mid-shaft (leaving out the ends), twisting the hair away from your face. Hold for a few seconds. Repeat throughout the hair, alternating between twisting the hair toward and away from your face to make the waves look natural. Let cool and shake out to loosen curls.
Add Shine
To tame flyaways, prevent frizz and add shine, rub a few drops of natural oil (instead of store-bought frizz serum) in your fingers and then smooth over ends and affected areas. We love sweet almond oil, coconut oil, argan oil and olive oil.
Hold in Place
To keep your blowout looking fresh and bouncy, also use a light hairspray. Just don’t spray too much. Remember–the more product you use, the quicker your hair will need to be washed!
For a quick video to help you along, here is a good blowout tutorial from the archives.

It Starts in the Shower
A great blowout starts with using the right shampoo and conditioner for your hair type. If your hair is flat or lacks volume, go for a volumizing formula. If your hair is dry or textured look for gentle sulfate-free shampoos.
Rinse Well
You may use the best shampoo ever made for your hair, but it is all for naught if you don’t rinse it out completely. Shampoo residue leaves hair dull and lifeless. And remember this–use warm, not hot water to prevent dryness.
Condition, Condition, Condition
Practically everyone should use conditioner. For those you avoid conditioner because you worry that it will flatten your hair, just change how you use it. Apply it sparingly from only mid-shaft to ends or just even your ends only if your hair is very thin or fine. Again, never rinse hair with hot water. Warm water will do the job. To prevent frizz, also do a final cool-water rinse after conditioner is rinsed out. This will close the hair cuticle to smooth strands.
Be Careful with that Towel
Never rub your hair to remove excess water post shower. The towel fibers are too rough and lift the hair cuticle to create frizz. Instead, use a microfiber towel or even paper towels to remove excess water.
Pick the Right Styling Products
If you are going for the smoothest look possible, use a heavier cream-based grooming product or gel. If you just need some light hold and volume go for a volumizing mousse or spray. Follow with a heat-protectant to save your strands and combat frizz.
Work on Damp, Not Sopping Wet Hair
Although an obvious point, working on sopping wet hair takes too much time and effort. Instead, rough dry your hair on low heat (as they always do in the salon) until about 70-75% dry.
Use the Right Blow Dryer
The best voluminous blowouts start with a good quality blow dryer (at least 1875 watts). Also make sure to invest in a frizz-fighting Ionic dryer if you have issues with frizz.
Grab the Right Brush
The best brush to use for a blowout is a round boar bristle brush or (for even more tension and control) a boar bristle brush mixed with nylon bristles. Both work well without damaging your strands. Also make sure you have a bunch of hair clips on hand to section the hair. Which leads us to the next tip…
Work in Sections
Always work in small sections (as pros do in the salon) for the smoothest results. There are many ways to section hair, but the easiest way to do this is to create one section on the top of your head from forehead to crown (about as wide as the width of your brush) and create 2-3 horizontal sections on the sides and back of your head (depending on the texture and thickness of your hair).
Start in Back, Finish on Top
Now that you have sectioning down, we recommend you start your blowout at the nape of your neck (after sectioning and clipping the upper portion of your hair). Once the back is dry, section and dry each side before completing the (most important) top section.
Keep to Brush Width
Within each section you are working on, gather hair no wider than the width of the brush for the best control.
Point the Nozzle Down
For maximum shine and smoothness, point the nozzle down on the hair. This will smooth the hair cuticle to add shine and prevent frizz.
Use Tension
Proper tension is also important. Place the brush underneath the hair and move the brush and the dryer down the length of the section (with the hair dryer pointing down on the hair shaft), making sure to keep the hair taut. Repeat this step again, this time placing the brush on top of the section. Repeat until section is dry, alternating between placing the brush both on top of and underneath the section of hair. Unpin your next section and repeat these steps.
Add Volume at the Crown
When you dry the top section, you can build killer volume by just changing the direction of the tension. Instead of pulling the hair downward with your brush (as you did on the sides and back), pull the hair upwards and back to the crown as you move the dryer with it.
Use the Cool Shot
Once the hair is completely dry, pass through your entire head using the cool shot button on your hair dryer. This will close the hair cuticle to prevent frizz.
Add Some Waves
Since tousled waves are so hot right now, you may want to add a few bends once your blowout is complete. Using a mid-sized barrel curling iron, wind a 2-inch section of hair around the iron starting at mid-shaft (leaving out the ends), twisting the hair away from your face. Hold for a few seconds. Repeat throughout the hair, alternating between twisting the hair toward and away from your face to make the waves look natural. Let cool and shake out to loosen curls.
Add Shine
To tame flyaways, prevent frizz and add shine, rub a few drops of natural oil (instead of store-bought frizz serum) in your fingers and then smooth over ends and affected areas. We love sweet almond oil, coconut oil, argan oil and olive oil.
Hold in Place
To keep your blowout looking fresh and bouncy, also use a light hairspray. Just don’t spray too much. Remember–the more product you use, the quicker your hair will need to be washed!
For a quick video to help you along, here is a good blowout tutorial from the archives.